
Painting Mole’s Hideout – 3D Printed Terrain D&D Australia
- 3dprintsjrc
- Mar 18
- 3 min read

I've finally had some time to get this terrain piece painted! This is the first terrain piece I printed by DM Stash, and it was a monster of a print project. The print itself was 12 different pieces that were about 14 hours each, and used about 3kg of filament over all. We'd used it a few times as a group, but it was unpainted, I finally had time to change that.
Painting Mole’s Hideout (3D Printed Terrain Timelapse)
If you’ve ever looked at a raw 3D print and wondered how it becomes a fully painted, tabletop-ready terrain piece— I have recorded the processes I take to take it from print to play ready.
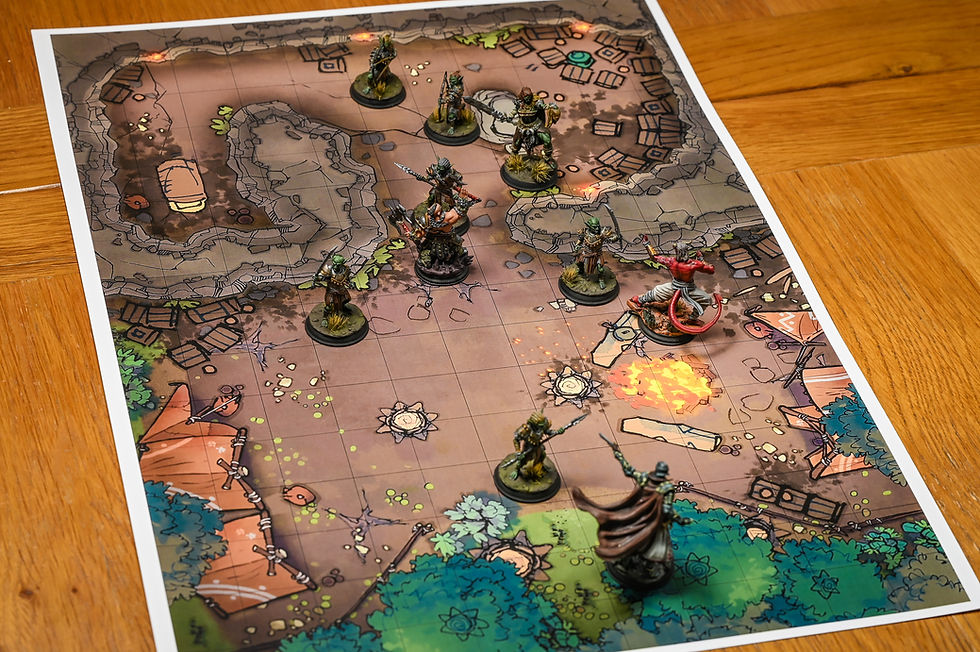
In this video (Part one of 3), I take a level of “Mole’s Hideout” (the roof), a detailed terrain piece from DM Stash, and transform it from a freshly printed model into a finished piece ready for your next Dungeons & Dragons or tabletop session. That's how I took it from this:

To this!
Why 3D Printed Terrain is perfect for D&D
3D printing has completely changed how we build immersive tabletop environments. Instead of relying on expensive or limited terrain options, you can now create highly detailed pieces like this hideout right at home—or have them printed for you.
This piece was:
3D printed using PLA via FDM (P1S Bambu)
Cleaned and prepared for painting
Painted using fast, tabletop-ready techniques
The goal wasn’t just to make it look good—but to make it usable, durable, and visually impactful on the table.
Painting Approach (Fast & Effective)
For this project, I focused on techniques that balance quality with speed:
Base coating to establish strong colours
Minimal Washes but other tips and tricks to bring out depth and shadows
Dry brushing to highlight texture and detail
Simple detailing to finish the piece without overcomplicating it
This approach is perfect for:
Dungeon Masters prepping sessions quickly
Wargamers building full boards
Hobbyists wanting solid results without hours per piece
Why Terrain Like This Matters
Great terrain does more than just look good—it:
Increases immersion for players
Makes encounters more memorable
Helps visualise positioning and movement
Elevates your entire tabletop experience
A piece like Mole’s Hideout can easily become the centrepiece of an ambush, a boss encounter, or a hidden objective location.
Don’t Have a 3D Printer?
That’s exactly why I started Useful 3D Prints.
If you don’t have a 3D printer but want terrain like Mole’s Hideout, I offer high-quality 3D printing services across Australia:
High-quality 3D printing in Australia
Terrain, miniatures, and custom requests
Ready-to-paint or cleaned prints
Looking for 3D printed terrain in Australia? Check out my services here:
Or if you want this exact terrain piece to paint yourself, click here
FAQ
What is the best way to paint 3D printed terrain?
Using basecoats, washes, and dry brushing is the fastest way to achieve tabletop-ready results.
Can I buy 3D printed terrain in Australia?
Yes, you can order custom 3D printed terrain and miniatures through my service at Useful 3D Prints here.
What material is best for terrain printing?
PLA using FDM printing is ideal for large terrain pieces due to its durability and cost-effectiveness.


Comments